Do you ever look at your walls and think, what a bore! How drab! Well, reader, give your walls some old-world charm by installing chair rail and wainscoting.
I recently moved upstate into a house with Very Boring Walls: bare except for the baseboards and some generic moldings around the doors and windows. The walls were beige and mint, and looked cookie-cutter and boxy, which — in this early aughts saltbox pre-fab — they were. They needed personality. So, with no previous experience and having never before used a saw, I added some wainscoting. I had a tiny budget and no professional help, but installation was easy enough. The finished effect added texture and allowed for more color, pattern, and finishing options for each room. In short, my work looks incredible, and now the rooms practically beg for martini hour.
If I can do it, you can too!
DIY Wainscoting: What You’ll Need
-
- Chair rail: Measure the length of the rooms and add up math to figure out how much you’ll need. Boards are usually 8 ft long. Add another board or two just in case.
- Wall trim molding. My rooms are small, and I wanted something vaguely European, so I went with thin, traditional picture frame molding. But options are infinite! Again, buy more than you’ll need. Despite triple-checking the math, I made a lot of mistakes. Check each piece before buying to make sure it’s in good shape.
- Miter saw. Dual bevel is ideal, for both wall corners and panel.
- Brad nailer and brads. No air compressor needed.
- Level.Smaller handheld ones are better, even if they take longer.
- Pencil.
- Painter’s tape.
- Caulking. Make sure it’s paintable.
- Wood putty.
- Paint: of your choice in two finishes — gloss or semi-gloss, and eggshell or matte.
- Paint brushes.
- Optional: a scrap piece of wood that can be cut into blocks to help measure spacing
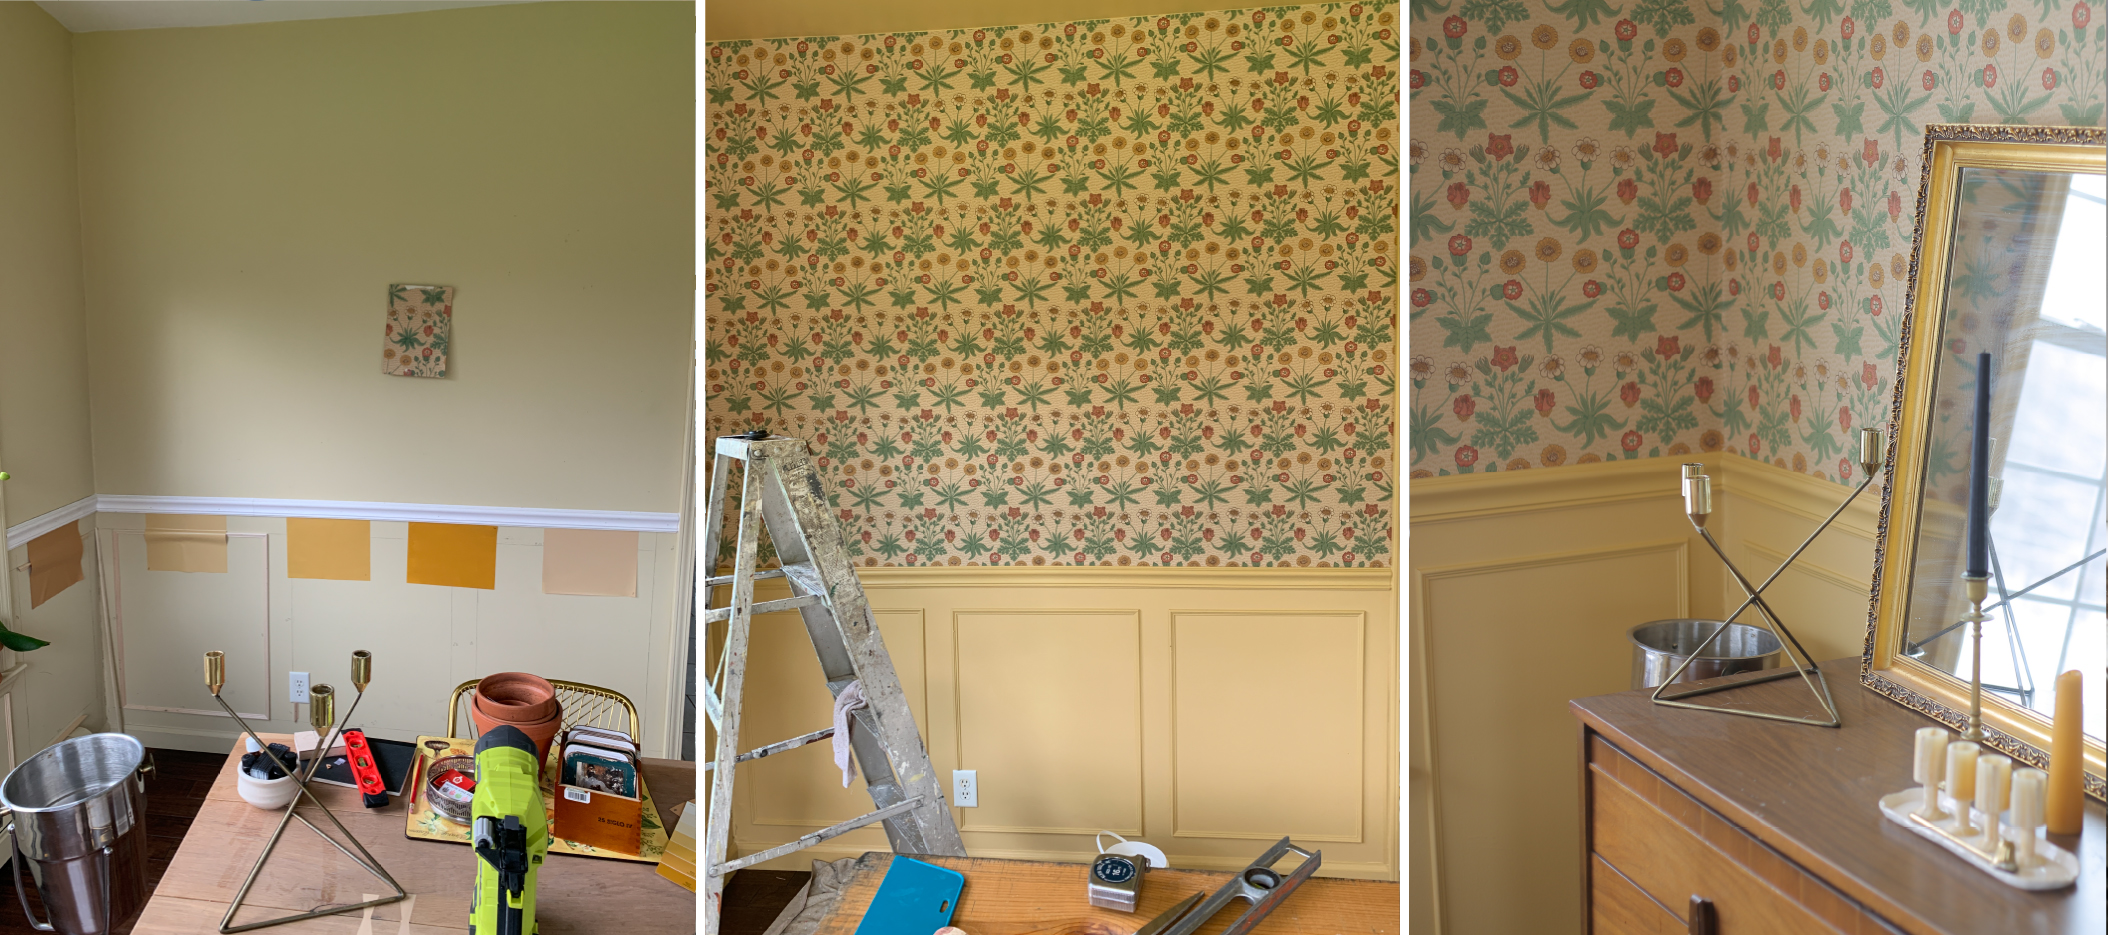
The dining room, during & after the project.
For the Chair Rail:
Step One: Measure the height of your walls, and draw a level line for your chair rail.
Convention dictates that chair rail should hang about ⅓ of the wall from the floor. This is just a guideline, and there are many examples of well-done high wainscoting, so do what thrills you. Using your level, draw a level line around the whole room. You’ll be hanging your chair rail under the level line, so make sure to draw it where you want the top of the chair rail to be.
Step Two: On your chair rail, measure and mark lengths, and using your miter saw, cut pieces accordingly.
I had many smaller pieces to squeeze in between windows and into corners. Make sure to write their measurements / location on the back of the chair rail so you can keep track of where it will be hung. Mark a line on your chair rail with pencil to know where to cut. For cutting chair rail to fit into corners: set your miter saw to a 45 degree angle—or less, if your corners feel larger than 90 degrees. I ended up setting mine 44 degrees to fill out my wider corners. Make sure your bevel angle is set on for the specific corner you’re cutting. Stand your chair rail up on your miter saw—the way you would mount it on the wall—and cut into the chair rail at the 45 degree angle. Do this on the other side for the opposite piece of rail. wall. It may take a few tries to get right. Luckily, imperfections can be hidden with caulking and wood putty, so don’t worry if it’s not a perfect fit.
Step Three: Nail the chair rail to the wall with a brad nailer.
Some DIYers will suggest using Hard As Nails bonding glue as well, but I found it messy and unnecessary. Make sure to press your brad nailer flush against the chair rail in order to have the brad disappear into the wood.
For the Picture Frame Panels:
Step One: Determine the amount, size, and spacing of panels on each wall.
Ideally, panels should be consistent in size and spacing, although this is not always possible. It helps to draw a diagram, and try different sizes to get an ideal fit. I wanted each panel to be spaced either 3 or 3.5 inches apart, so I determined my number and size of panels accordingly. If your walls have windows or other installations, it’s probably best to start there. For my first wall, I mocked up the panels I wanted with painter’s tape. Optional: Make spacers out of wood blocks. This helped me with spacing, but you can also use a measuring tape and level. I cut leftover wood into 3 inch and 3.5 inch wide blocks that I used to measure the spacing between each panel. I wrote 3 and 3.5 on them.
Step Two: Using blocks or measuring tape and level, draw all your lines for all your panels on the wall.
In my case, that meant drawing the top line 3 inches below my chair rail, 3 inches above my baseboard, and 3.5 inches apart from each other. Start from the center of each panel and work your way out, to get the most accurate symmetry possible.
Step Three: Remeasure your drawn panels and write each measurement down.
Depending on the shape of your walls, each box might be ¼ inch different from each other. It helps to number each box and set of measurements.
Step Four: Measure and cut your picture frame wall strips.
The molding must match at each corner, and can take some trial and error. Set your miter saw to 45 degree angle, and lay the wood strip into the saw according to which piece you’re cutting. For instance, if you are cutting for the top of the panel, make sure the molding is upright, and draw a diagonal line inwards on either side to mark the cuts for your miter saw. After I cut one side, I would feed the wood into the miter side backwards, to get the opposite diagonal cut. This might require some trial and error, but you’ll get the swing of your own approach! Write down the length and placement on the back of the wood.
Step Five: Nail molding to the wall.
As with the chair rail,keep the brad nailer flush against the wood so it goes as deep into the wood and wall as possible. If your walls are uneven, you’ll need several nails to get the strips flush against the wall.
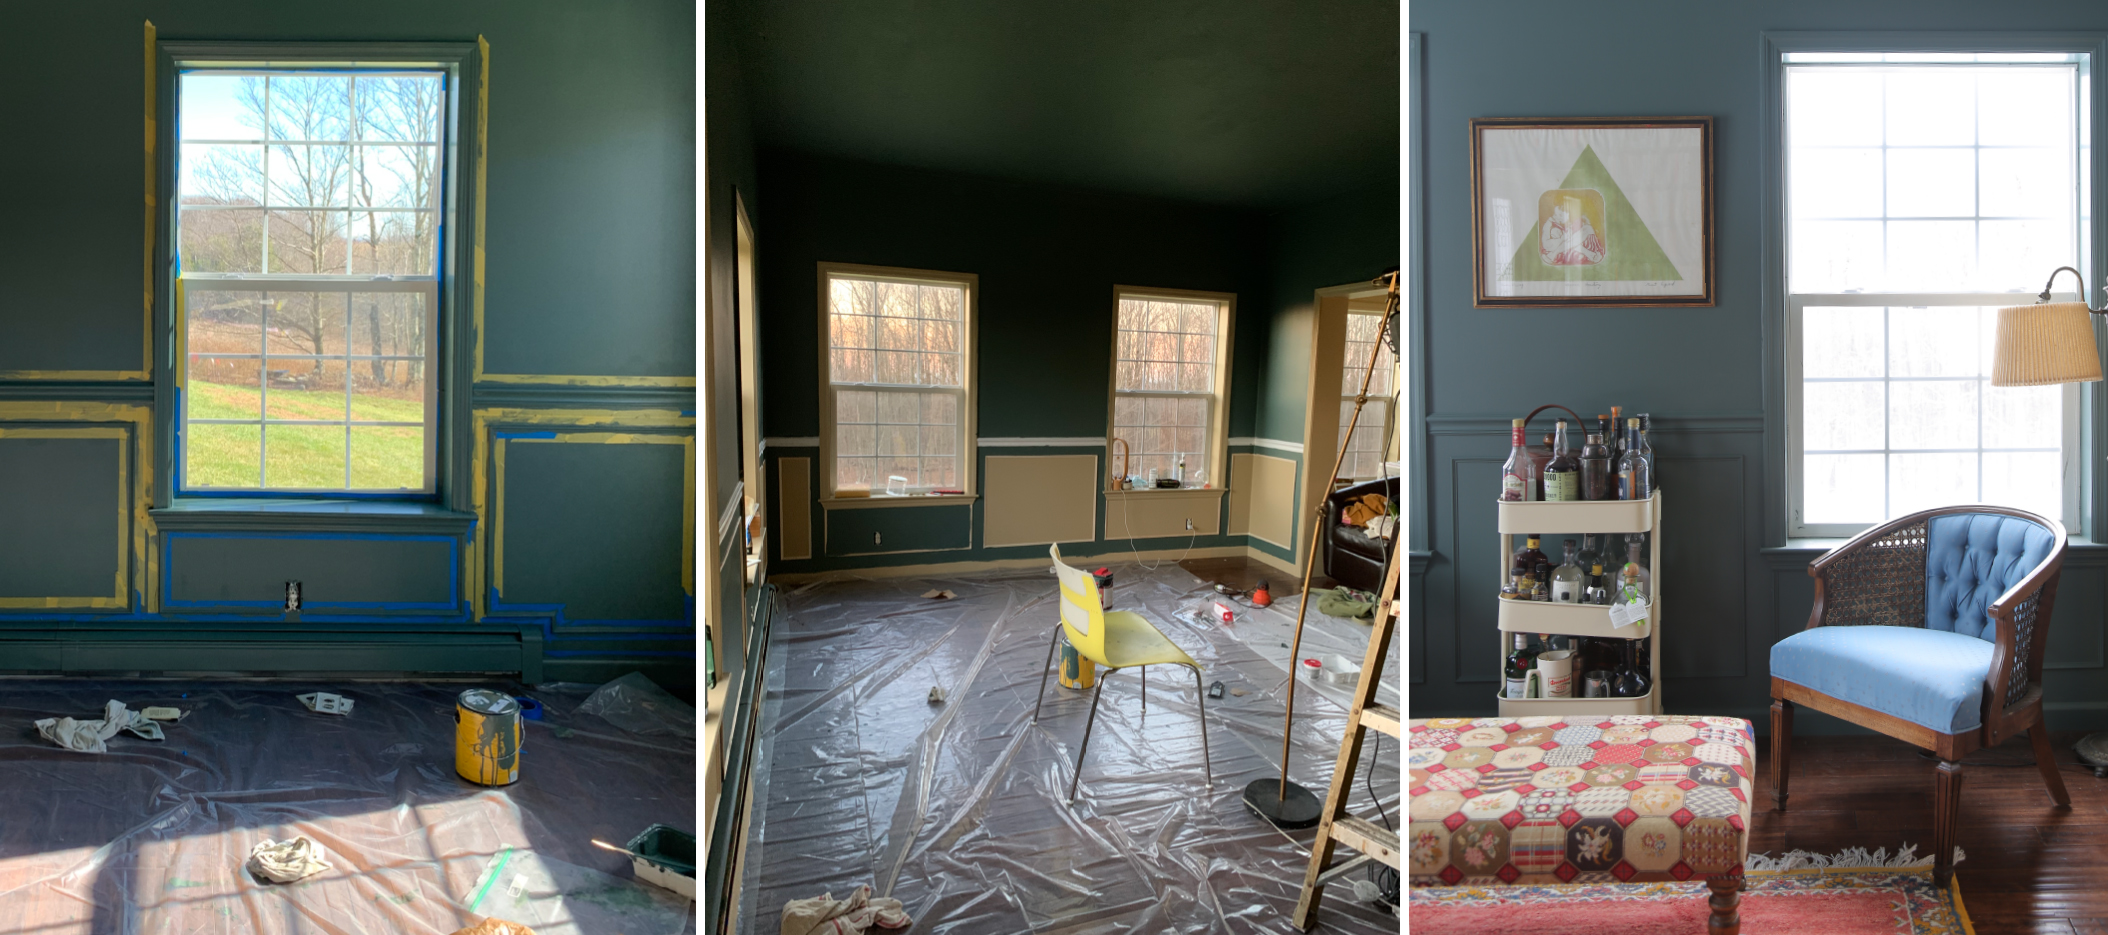
The cozy library, during & after the project.
Finishing Up:
Step One: Caulk everything.
This part is tedious but must be done. Caulk the top and bottom of the chair rail, fill those corners up with caulking, caulk every side of every piece of molding. Keep a wet rag and bowl of warm water handy for wiping off excess caulking. I ended up using my fingers a lot to drag and smush caulking into every crevice and then wiped off any excess with the warm wet towel. It took forever and was boring as hell, but it made all the difference in the finished look.
Step Two: Fill brad holes with wood putty and wipe off excess with a damp rag.
Step Three: Paint!
Paint the moldings in a higher gloss to make the wainscoting look like real wood. You can either paint the whole bottom third of your wall in a different finish, or just the paneling you installed. Either will look cool.
Afters: The Final Result
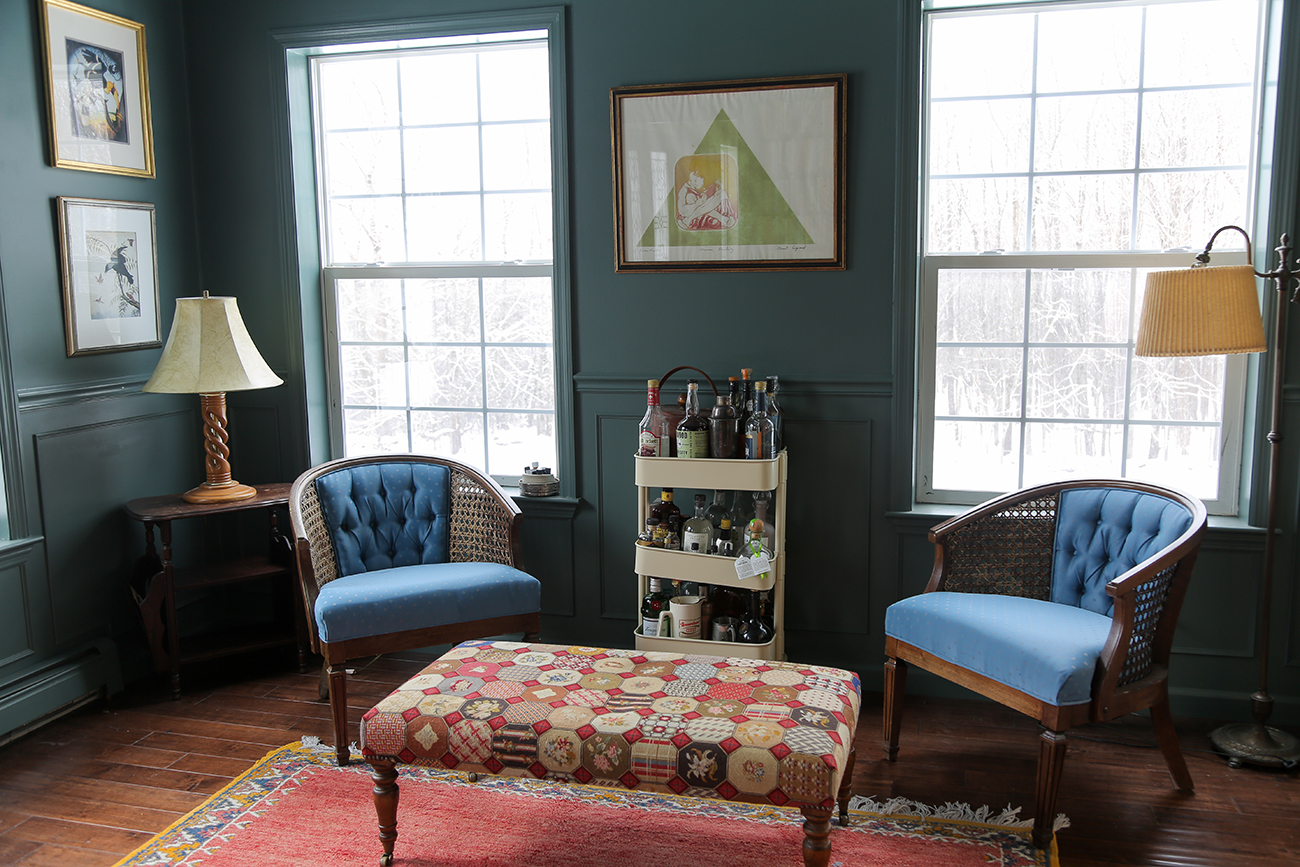
Tom and Anna of Homestedt suggested I paint the ceiling, and they were right. Cocooned in dramatic green, the office / library feels cozy, even on sunny days.
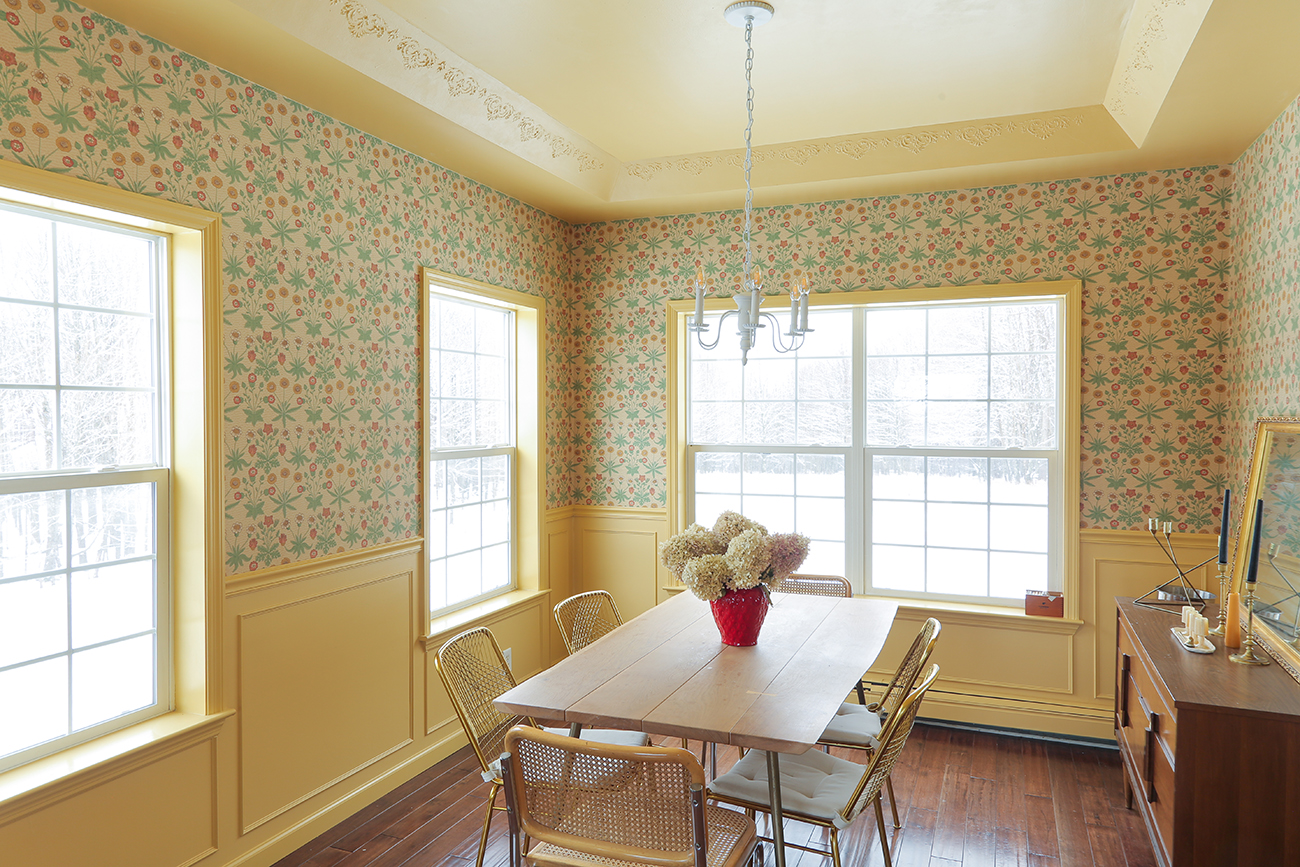
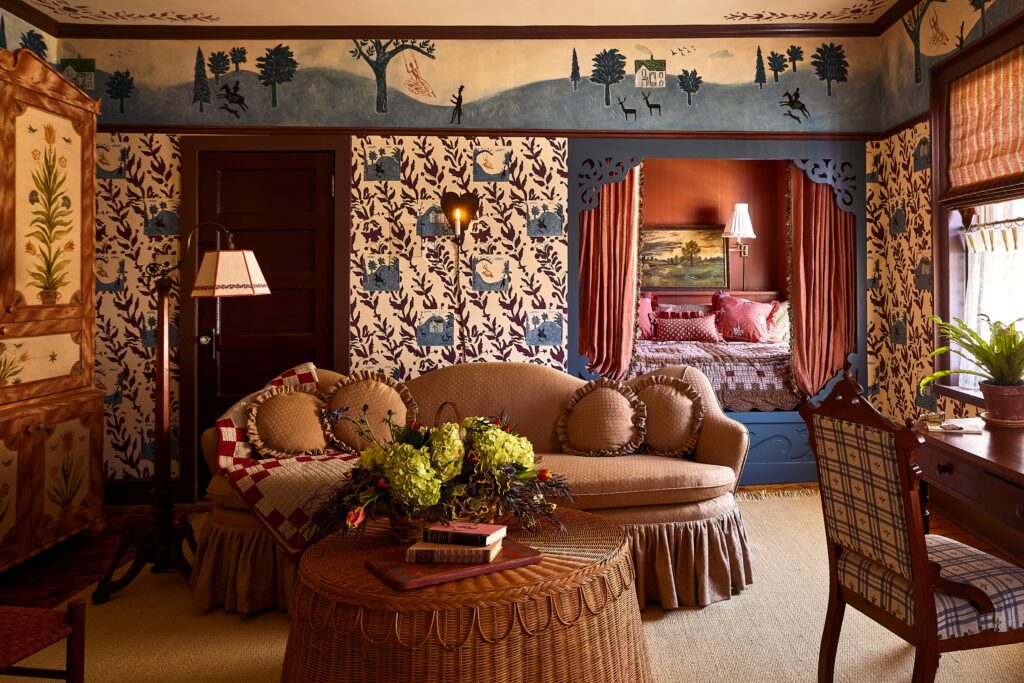
I tested nine yellows, three terracottas, and too many wallpapers to count. In the end, I went with a lemony-gold; lighter than the marigolds, more eye-catching than the wallpaper’s base color. The room feels decadent and zany, my two favorite adjectives for decor.
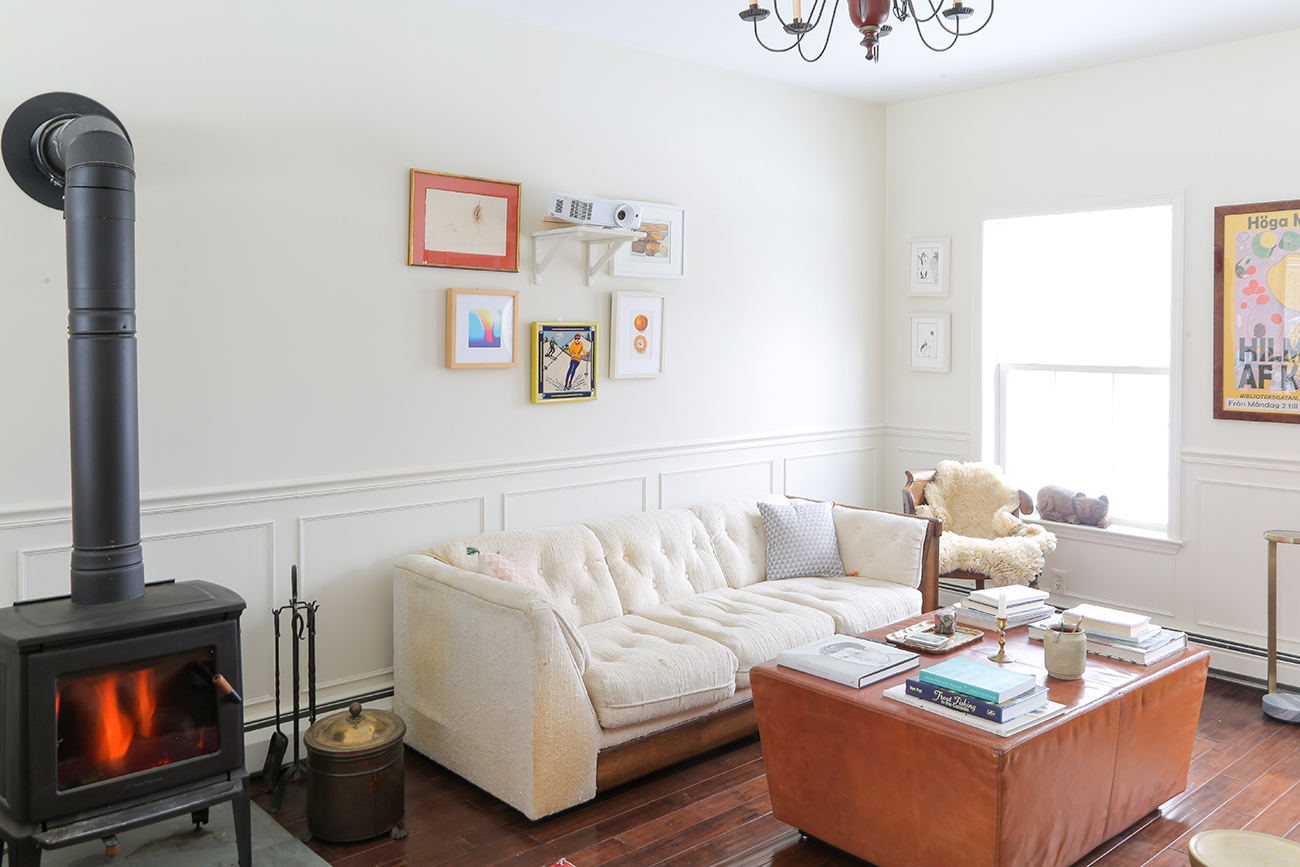
The cozy, textured, finished living room.

